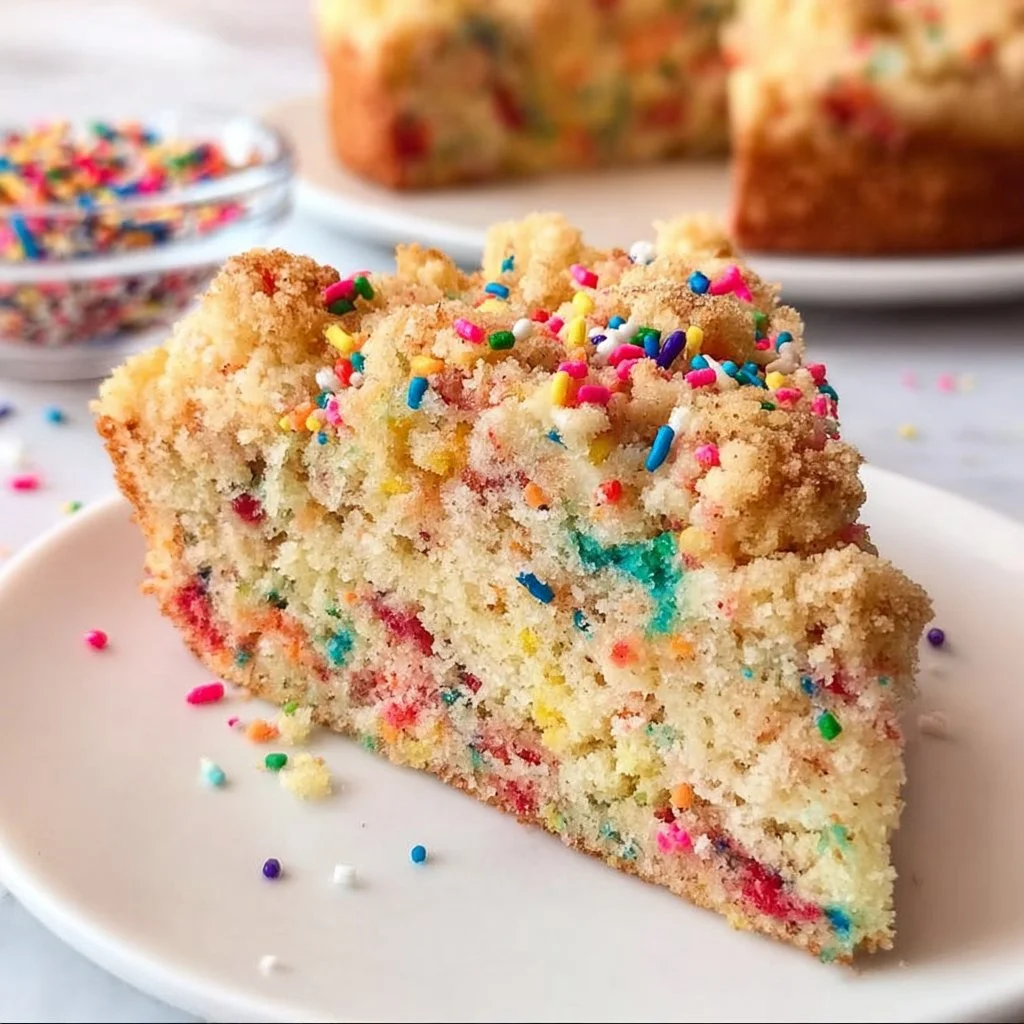
Milk Bar Birthday Cake is a delightful treat that transcends the ordinary birthday celebration. Originating from the iconic Milk Bar bakery, this cake has become synonymous with joy and festivity. Picture layers of fluffy cake, vibrant rainbow sprinkles, and a luscious frosting that prompts a smile with every slice. Whether you’re celebrating a milestone birthday or simply indulging in the sweet nostalgia of childhood, this cake is a wonderful way to make any occasion special.
Why We Love This Milk Bar Birthday Cake Recipe
There are countless reasons to adore the Milk Bar Birthday Cake, but the most compelling might be its perfect blend of flavor and fun. The combination of buttery cake and fluffy frosting makes it not just a dessert, but a whole experience. The surprise of colorful sprinkles brings life to the cake, reminding us of the delightful joys of childhood. It’s simple to make yet so impressive, making it a go-to for home bakers and dessert lovers alike. The memories tied to the first slice of coconut cake among loved ones are an experience that we cherish and strive to replicate. This cake doesn’t just taste good; it evokes feelings of happiness, laughter, and celebrations.
Ingredients about Milk Bar Birthday Cake
To create your very own Milk Bar Birthday Cake, gather the following ingredients:
For the Cake:
- 2 1/2 cups cake flour
- 2 1/2 teaspoons baking powder
- 1/2 teaspoon salt
- 1 cup unsalted butter, softened
- 2 cups granulated sugar
- 1 cup light brown sugar
- 4 large eggs
- 1 tablespoon vanilla extract
- 1 cup whole milk
- 1 cup rainbow sprinkles
For the Frosting:
- 1 cup unsalted butter, softened
- 4 cups powdered sugar
- 1/4 cup heavy cream
- 1 tablespoon vanilla extract
How to Make Milk Bar Birthday Cake Directions
Making this cake is an enjoyable process, and before you know it, you’ll be savoring each slice. Start by preheating your oven to 350°F (175°C) and grease three 8-inch round cake pans. Ensuring the pans are ready helps the cakes release easily after baking.
Next, in a medium bowl, whisk together the cake flour, baking powder, and salt. This mixture will provide your cake with the perfect structure, so be sure to combine these dry ingredients well. In a large mixing bowl, cream together the softened butter, granulated sugar, and brown sugar with a hand mixer or stand mixer. Beat the mixture on medium speed until it becomes light and fluffy. This usually takes about 3 to 5 minutes.
Once your butter and sugars are fluffy, add in the eggs one at a time, mixing thoroughly after each addition. This step helps to incorporate air into your batter, creating a light cake. Don’t forget to add the vanilla extract during this process. Now it’s time to incorporate your dry ingredient mixture and the milk. Alternate between adding the dry ingredients and the milk to the butter mixture, starting and ending with the flour mixture. Mix until just combined; overmixing might lead to a dense cake.
Now, for that fun twist! Gently fold in the rainbow sprinkles using a spatula. This will not only create pockets of color in your cake but also add to the delightful experience that is the Milk Bar Birthday Cake. Divide the batter evenly among the prepared pans. Smooth the tops with a spatula to ensure even baking. Place the pans in the oven and bake for 25-30 minutes. Keep an eye on them, and use a toothpick inserted into the center to check for doneness. When it comes out clean, your cakes are ready!
Once the cakes are baked, allow them to cool in their pans for about 10 minutes. This step helps them set before transferring them to wire racks. Cool the cakes completely to ensure your frosting doesn’t melt when you let it meet the cake.
While the cakes are cooling, it’s the perfect time to prepare the frosting. In a large bowl, combine the softened butter, powdered sugar, heavy cream, and vanilla extract. Beat these ingredients together using a mixer until it’s light and fluffy, about 2-3 minutes.
When your cakes are newly cooled, it’s time for assembly. Take one layer of cake and place it on a serving plate or cake stand. Spread an even layer of frosting on top, and then add the second layer. Repeat with the third layer, finishing with a generous amount of frosting on the top. You can decorate the top as you desire—sprinkles are always a festive touch.
How to Serve Milk Bar Birthday Cake
This cake shines brightest when served fresh. You can enjoy it as a delightful dessert at birthday parties, gatherings, or just as a special end to your meal. For a celebratory touch, decorate each slice with extra sprinkles, which will bring a burst of color to each plate.
Pair slices with a scoop of vanilla ice cream for a classic combination. The creaminess of the ice cream complements the rich cake perfectly. Additionally, it adds a delightful chill to each bite. You can even drizzle a little chocolate syrup over the top for an extra layer of sweetness.
When serving, ensure you have a sharp knife on hand to cut clean slices. Each piece should reveal the bright colors of the sprinkles and fluffy frosting inside. This cake is best enjoyed with friends and family, as the experience of sharing a beautiful creation brings joy and laughter.
Expert Tips: Milk Bar Birthday Cake
To make the most of your baking experience, here are some expert tips. First, measure your flour correctly; too much can lead to a dense cake. Use the spoon-and-level method, where you spoon the flour into a measuring cup and level it off with a knife.
Ensure your butter is thoroughly softened before mixing. This aids in creating a fluffy batter and ensures the cake doesn’t bake up too dense. If you forget to take it out in advance, you can cut it into smaller pieces or even microwave it for a few seconds, but be careful not to melt it!
Don’t forget to preheat your oven before you begin mixing ingredients. An already heated oven is crucial for proper cake rising. Also, allow your cakes to cool completely; a warm cake can make your frosting melt and slide off.
For the frosting, feel free to add a touch more cream if it’s too thick or a bit more powdered sugar if it’s too thin. You want it to have a smooth, spreadable consistency. If you want to create fun patterns or swirls on the top, use an angled spatula for a professional touch.
How to Store Milk Bar Birthday Cake
To store any leftover cake, ensure it’s completely cooled, if you have more than you can eat at once. You can keep the cake covered in an airtight container at room temperature for up to three days. If it lasts longer than that, consider refrigerating it for up to a week.
If you wish to preserve it for an even longer period, slice it and wrap individual pieces in plastic wrap. Place the wrapped slices in a freezer-safe container or bag, and freeze them for up to three months. When you’re ready to enjoy your cake again, thaw it overnight in the refrigerator or at room temperature for a few hours.
Variation of Milk Bar Birthday Cake
While the classic Milk Bar Birthday Cake is undeniably delicious, experimenting with variations can yield exciting results! You can customize it to cater to different tastes and preferences.
For a chocolate twist, consider swapping out some of the cake flour for cocoa powder to create a chocolate version. You can also use chocolate sprinkles instead of rainbow ones for a decadent touch. Additionally, incorporating chocolate chips into the batter will provide delightful pockets of melted chocolate.
If you’re feeling a bit adventurous, you can fill the cake layers with raspberry or strawberry jam for a burst of fruitiness that pairs remarkably well with the rich frosting. For an extra layer of flavor, think about adding a hint of almond extract alongside the vanilla in the recipe, creating a uniquely flavored cake that excites the palate.
For a nutty flavor, fold in some chopped nuts, such as pecans or walnuts, into the batter before baking. This adds texture and a lovely crunch that is familial yet refreshing. Whether you stick to the classic or try something new, there’s no losing with this amazing cake.
FAQ
What makes the Milk Bar Birthday Cake unique?
The Milk Bar Birthday Cake is unique due to its playful use of colorful sprinkles, which provide a fun texture and appearance. The fluffy cake and creamy frosting work together beautifully, making it an eye-catching centerpiece for any celebration.
Can I make the Milk Bar Birthday Cake ahead of time?
Absolutely! You can make the cake layers a few days in advance. Just store them properly in an airtight container until you’re ready to frost and serve them.
What type of flour works best for the Milk Bar Birthday Cake?
Cake flour is preferred for this recipe as it has a lower protein content compared to all-purpose flour, resulting in a tender and light cake.
Can I substitute the butter with something else?
While butter provides a rich flavor, you can substitute it with margarine or a dairy-free alternative if needed. However, the texture and taste may be slightly different.
How can I make this cake gluten-free?
To make this cake gluten-free, you can substitute the cake flour with a gluten-free all-purpose flour blend. Be sure to check that all other ingredients are also gluten-free.
Is it possible to reduce the sugar in the recipe?
You can reduce the sugar slightly, but keep in mind that sugar contributes to the cake’s structure and texture. When making baked goods, a careful balance is essential to maintain the desired outcome.
Milk Bar Birthday Cake
Ingredients
For the Cake
- 2 1/2 cups cake flour
- 2 1/2 teaspoons baking powder
- 1/2 teaspoon salt
- 1 cup unsalted butter, softened
- 2 cups granulated sugar
- 1 cup light brown sugar
- 4 large eggs
- 1 tablespoon vanilla extract
- 1 cup whole milk
- 1 cup rainbow sprinkles
For the Frosting
- 1 cup unsalted butter, softened
- 4 cups powdered sugar
- 1/4 cup heavy cream
- 1 tablespoon vanilla extract
Instructions
Preparation
- Preheat your oven to 350°F (175°C) and grease three 8-inch round cake pans.
- In a medium bowl, whisk together the cake flour, baking powder, and salt.
- In a large mixing bowl, cream the softened butter, granulated sugar, and brown sugar until light and fluffy, about 3 to 5 minutes.
- Add the eggs one at a time, mixing thoroughly after each addition along with the vanilla extract.
- Alternate adding the dry ingredients and the milk to the butter mixture, starting and ending with the flour mixture. Mix until just combined.
- Gently fold in the rainbow sprinkles.
- Divide the batter evenly among the prepared pans and smooth the tops.
Baking
- Bake in the preheated oven for 25-30 minutes, or until a toothpick comes out clean.
- Allow the cakes to cool in the pans for about 10 minutes, then transfer to wire racks to cool completely.
Frosting and Assembly
- In a large bowl, combine the softened butter, powdered sugar, heavy cream, and vanilla extract to make the frosting. Beat until light and fluffy, about 2-3 minutes.
- Once the cakes are completely cooled, place one layer on a serving plate, spread frosting on top, and repeat with remaining layers.
- Finish with a generous layer of frosting on top and decorate as desired with extra sprinkles.