If you’re looking for a dessert that perfectly embodies the cozy flavors of fall, look no further than apple bars. These delightful treats combine the sweetness of baked apples with a crumbly oat topping, creating a delightful balance of textures. With just a few simple ingredients and a straightforward process, you can whip up a batch of apple bars that will have your kitchen smelling like heaven. Let’s dive into the world of apple bars and discover why they are a beloved favorite among many.
Why We Love This Apple Bars Recipe
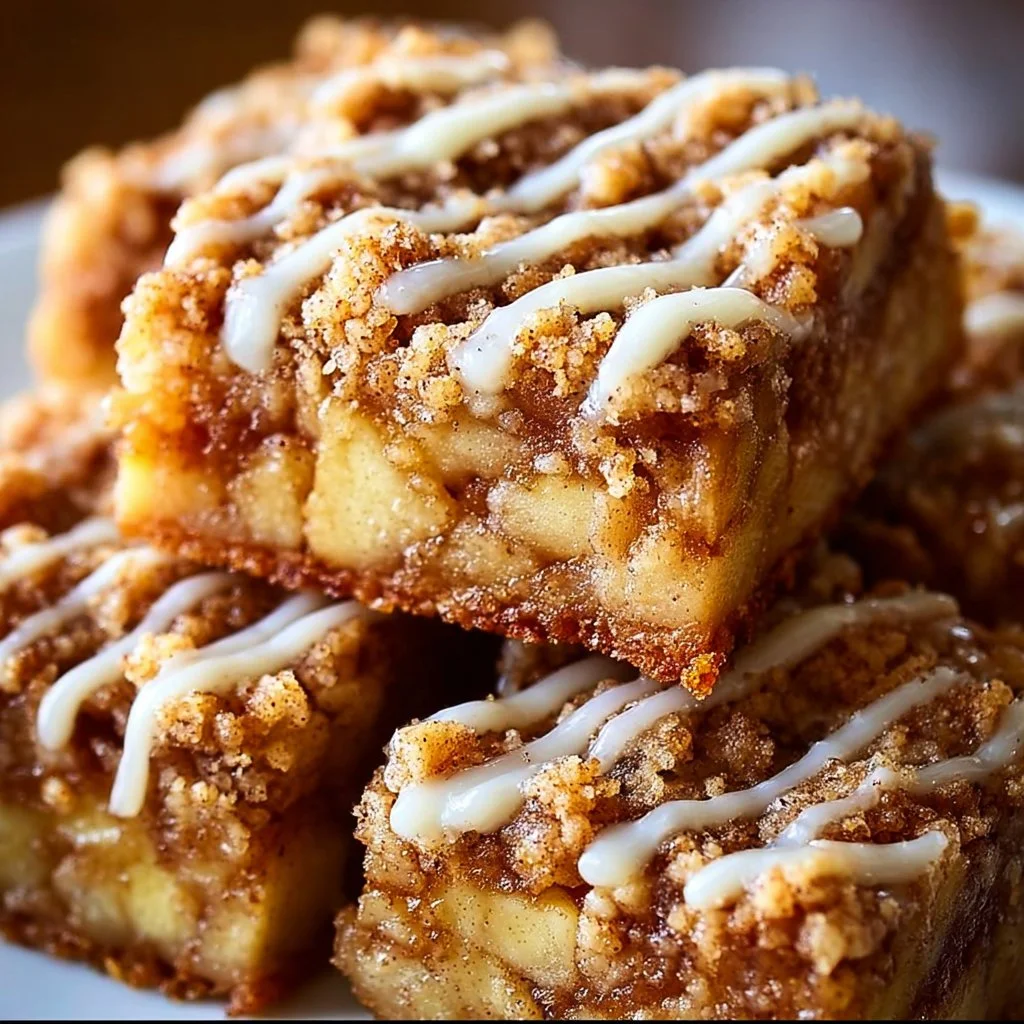
There’s something incredibly comforting about apple-based desserts, and apple bars are no exception. Whether you’re treating yourself after a long day or preparing a dessert for a gathering, apple bars hit the right spot. The combination of soft, sweet apples with a crumbly topping offers a delightful contrast that your taste buds will thank you for. Plus, this recipe is easy to follow, making it accessible for bakers of all levels. The warmth of cinnamon and the freshness of apples create an irresistible dessert that’s perfect for any occasion.
Ingredients for Apple Bars
To make these scrumptious apple bars, you will need the following ingredients:
- 2 cups all-purpose flour
- 1 1/2 cups old-fashioned oats
- 1/2 cup granulated sugar
- 3/4 cup brown sugar
- 1 cup unsalted butter, cold and cubed
- 1/2 teaspoon salt
- 1 1/2 teaspoons ground cinnamon
- 1/4 teaspoon nutmeg (optional)
- 3 cups apples, peeled and chopped
- 1 tablespoon lemon juice
- 1 tablespoon cornstarch
- 1 teaspoon vanilla extract
- 1/2 cup powdered sugar
- 1-2 tablespoons milk (for glaze)
These simple ingredients come together to create a dessert that feels homemade and comforting.
How to Make Apple Bars
Creating apple bars is a satisfying process that begins well before you get to taste the delightful end result. Follow these steps for perfectly baked apple bars:
- Preheat the Oven: Start by preheating your oven to 350°F. This ensures that your apple bars bake evenly and achieve that golden-brown color.
- Prepare Your Pan: Line a 9×13-inch baking pan with parchment paper. This will make removing the bars much simpler once they are baked.
- Mix the Dry Ingredients: In a large bowl, combine the flour, old-fashioned oats, granulated sugar, brown sugar, salt, and ground cinnamon. Stir these together until they are well mixed.
- Cut in the Butter: Take your cold, cubed butter and cut it into the dry mixture using a pastry cutter or your fingers. You want the texture to become crumbly with small pea-sized pieces of butter remaining.
- Reserve for Topping: Set aside 1 ½ cups of this crust mixture to use as a topping later. Press the remaining mixture into the bottom of your prepared pan, creating an even layer.
- Bake the Crust: Place the pan in the preheated oven and bake for 10–12 minutes, or until it just starts to turn golden.
- Prepare the Apple Filling: While the crust bakes, take another bowl to toss your chopped apples with lemon juice, cornstarch, vanilla extract, ground cinnamon, and nutmeg (if using). Ensure the apples are well coated.
- Spread the Apple Mixture: After the crust has baked, remove it from the oven and spread the apple mixture evenly over the top.
- Add the Topping: Sprinkle the reserved crumb topping over the apple layer, ensuring even coverage.
- Bake Again: Place the pan back in the oven and bake for an additional 30–35 minutes, until the top is golden brown and the apples are bubbling.
- Cool and Glaze: Once baked, let your apple bars cool completely in the pan. Once cooled, whisk together the powdered sugar with milk to make a glaze and drizzle it over the top before slicing into bars.
By following these steps, you are guaranteed a batch of apple bars that is as delicious as it is beautiful. Each bite will be full of flavor and warmth, a perfect treat to share with family and friends.
How to Serve Apple Bars
Apple bars are incredibly versatile when it comes to serving them. You can enjoy them on their own as a sweet snack, or elevate the experience by adding a scoop of vanilla ice cream on the side for a delicious a la mode treat. Serve them warm straight from the oven, or let them cool completely and pack them for a picnic or a lunchbox treat. For a festive touch, dusting your apple bars with a sprinkle of additional powdered sugar adds a beautiful finishing touch. Don’t forget to pair them with a warm beverage, like apple cider or a cup of tea, to enhance your dessert experience.
Expert Tips for Apple Bars
- Choose the Right Apples: The type of apple you use can significantly affect the flavor of your bars. Consider using a mix of sweet and tart apples, like Granny Smith and Honeycrisp, for a well-rounded taste.
- Don’t Skip the Lemon Juice: Adding lemon juice to the apples not only enhances their flavor but also prevents them from browning too quickly during preparation.
- Cool Completely: Allowing your apple bars to cool completely before slicing them is crucial. This step ensures that they set properly and hold their shape when cut.
- Modify the Topping: Feel free to add nuts like chopped walnuts or pecans into the reserved topping for an extra crunch.
- Focus on Texture: If you want your apple bars to have an even more crumbly topping, consider pulsing the topping mixture in a food processor for a finer consistency.
Experimenting with these tips can help you create apple bars that are uniquely yours, tailored to your personal preferences.
How to Store Apple Bars
Storing your homemade apple bars properly is key to keeping them fresh. Once they have cooled completely, cut them into bars and place them in an airtight container. You can keep them at room temperature for up to two days. For longer storage, consider placing the container in the refrigerator, where they can last for up to five days. If you want to keep them for an even more extended period, these apple bars can be frozen. Wrap individual bars in plastic wrap, then place them in a freezer-safe container or bag. They can last up to three months in the freezer. When you’re ready to enjoy them, simply thaw them in the fridge overnight or at room temperature.
Variations of Apple Bars
While this classic recipe is delightful, there are numerous ways to put a unique spin on your apple bars. Here are some ideas to inspire you:
- Add Dried Fruits: Consider mixing in dried cranberries or raisins with your apple filling for added flavor.
- Incorporate Spices: Spices such as ginger or cloves can add a warming flavor to the apple filling. Experiment to find your favorite combination.
- Nutty Crust: You can replace some of the oats with ground nuts or almond flour for a gluten-free option and added nuttiness.
- Cheesecake Filling: Make your apple bars even more decadent by adding a layer of cream cheese frosting or a cheesecake-inspired filling beneath the apple layer.
- Chocolate Drizzle: For a twist, melt some chocolate and drizzle it over the cooled bars before serving. Chocolate pairs surprisingly well with apples.
Exploring these variations allows you to enjoy apple bars in countless delightful ways, each offering something unique for your taste preferences.
FAQ about Apple Bars
What makes these apple bars different from regular apple pie?
Apple bars combine the delicious flavors of apple pie with a crunchy, crumbly topping, offering a more portable, easy-to-eat treat.
Can I use other fruits instead of apples in this recipe?
Absolutely! While apples are traditional, you can experiment with fruits like pears or mixed berries for a different experience.
How do I know when my apple bars are done baking?
Look for a golden-brown topping and bubbling apples. A toothpick inserted into the center should come out clean or with a few crumbs.
Can I make this recipe vegan?
Yes! Substitute the butter with plant-based margarine and use a flax egg or applesauce in place of the eggs if necessary.
How long will these apple bars stay fresh?
When stored properly, apple bars can last up to five days in the refrigerator and up to three months in the freezer.

Apple Bars
Ingredients
For the crust and topping
- 2 cups all-purpose flour
- 1 1/2 cups old-fashioned oats
- 1/2 cup granulated sugar
- 3/4 cup brown sugar
- 1 cup unsalted butter, cold and cubed Ensure butter is cold for proper texture
- 1/2 teaspoon salt
- 1 1/2 teaspoons ground cinnamon
- 1/4 teaspoon nutmeg (optional)
For the filling
- 3 cups apples, peeled and chopped Mix of sweet and tart apples recommended
- 1 tablespoon lemon juice Prevents browning of apples
- 1 tablespoon cornstarch
- 1 teaspoon vanilla extract
For the glaze
- 1/2 cup powdered sugar
- 1-2 tablespoons milk Adjust for desired glaze consistency
Instructions
Preparation
- Preheat your oven to 350°F (175°C).
- Line a 9×13-inch baking pan with parchment paper.
- In a large bowl, combine flour, oats, granulated sugar, brown sugar, salt, and cinnamon. Mix well.
- Cut in cold butter until the mixture resembles crumbs with pea-sized pieces.
- Set aside 1 ½ cups of mixture for topping. Press the rest into the bottom of the prepared pan.
Baking
- Bake the crust for 10–12 minutes, until lightly golden.
- Meanwhile, in another bowl, toss chopped apples with lemon juice, cornstarch, vanilla, cinnamon, and nutmeg.
- Spread the apple mixture over the baked crust.
- Sprinkle reserved topping evenly over the apples.
- Bake for an additional 30–35 minutes, until topping is golden and apples bubble.
Finishing
- Cool completely in the pan before glazing.
- Whisk together powdered sugar and milk to create a glaze and drizzle over cooled bars.